source:budgetbytes.blogspot.com
no-knead ciabatta
$0.74 recipe / $0.12 serving
I know, man can not live on bread alone. So I'm a little obsessed with baking bread lately... humor me. There will be more "real food" soon, promise.You may remember this video that I referenced in my very first no-knead bread recipe post. The recipe and technique in the video are a little different from the basic no-knead recipe. The dough is wetter, it ferments for 18 hours at room temperature and is shaped into a long, fairly flat, ciabatta shaped loaf.
Well, I'm glad I decided to give this one a try. For some reason it seems easier than the original no-knead and the result so much better. The inside is lighter and fluffier. The flavor is wonderful. The shape, although flat, is perfect for sandwiches. PERFECT.
I followed the instructions in the video exactly. The video is great so give it a quick watch (it's only 5 minutes long) before making the bread. The only change I'll make next time is to divide it in two and make two smaller loafs. Everything else is just easy and perfect.
This is my new go-to bread!


Total Recipe cost: $0.74
Servings Per Recipe: 6
Cost per serving: $0.12
Prep time: 10 min. Cook time: 30 min. Rise/Ferment time: 18 hrs. Total: 18 hrs, 40 min.
| INGREDIENTS | COST | |
| 1 cup | whole wheat flour | $0.16 |
| 3 cups | bread flour | $0.44 |
| 1/4 tsp | yeast | $0.02 |
| 1.5 tsp | salt | $0.05 |
| 2 cups | warm water | $0.00 |
| 1 Tbsp | vegetable oil | $0.04 |
| 2 Tbsp | corn meal | $0.03 |
| TOTAL | $0.74 | |
STEP 1: In a large bowl combine the flour, salt, yeast and water (I like to combine dry ingredients first then add water). Stir it until it forms a sticky ball. Loosely cover and let sit at room temperature for 14-18 hrs.
STEP 2: After fermentation, the dough should be wet, sticky, very bubbly and fluffy. Turn the dough over onto itself a few times until it is a slightly smaller and compact. Prepare a work surface by placing a sheet of plastic wrap on a wet countertop (this "glues" it into place) and sprinkling it with flour.
STEP 3: Turn the sticky ball of dough out onto the flour covered plastic wrap. Sprinkle a little flour on top of the dough ball. Carefully stretch and shape the dough into a large rectangle. Prepare a baking sheet by smearing 1 Tbsp of vegetable oil over the surface and then sprinkling with corn meal. Pick the plastic wrap up and roll the rectangle of dough onto the prepared sheet. Reshape if necessary.
STEP 4: Let the loaf rise for two hours (it will rise out rather than up). Preheat the oven to 425 degrees and bake the loaf for 25-30 minutes or until it is golden brown. Let the bread cool on a wire rack before slicing.
Step By Step Photos

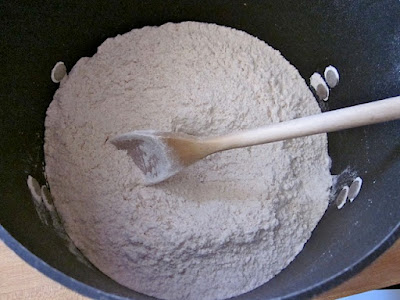
In a large bowl (or stock pot in my case) mix together the flour, salt and yeast.

Pour in the water and stir it up until it's a big sticky ball of dough.

Let the mixture sit at room temperature for 14-18 hours, during which time it will get big, fluffy and full of bubbles.

Turn the dough over on itself a few times to deflate. Coating your spatula with non-stick spray will keep it from sticking.

Place a sheet of plastic wrap on a wet counter top to anchor it down. Sprinkle the plastic wrap with flour and turn the dough out on top of it. Sprinkle a little flour on top of the dough so your hands don't stick.

Gently shape the dough into a long rectangle (don't make it longer than your baking sheet).

Pick up the plastic wrap and roll the dough onto a baking sheet prepped with vegetable oil and corn meal. Let the dough rise for two hours. It will rise out rather than up like most breads (picture = after 2 hrs of rising).

Bake the bread at 425 degrees for about 30 minutes or until the crust is medium brown. Let it cool before slicing.

It's pretty.

This bread is PERFECT for sandwiches. Light and fluffy inside with a good crust. YES!
Oh, my other favorite thing about this bread is that it only uses 1/4 tsp of yeast - TOTAL.Now I can make great bread every week and my yeast will last four times as long.
No comments:
Post a Comment